BookBinder and ShelfMate use Claude AI to read your shelf photos and turn them into a database of your books, CDs, LPs, and films. The better your photos, the better the results — and with a simple naming system, Claude knows exactly where everything lives on your shelves.
This guide walks you through the whole process: taking the photos, naming the files, zipping them up, and importing the results with ShelfMate or BookBinder's Import SQL page.
Take a wide overview shot first
Before you photograph individual sections, take one wide shot of the whole bookcase or storage unit. This becomes the bookcase card photo in BookBinder — the thumbnail that represents that bookcase in your browse list.
It doesn't need to be perfect. Just step back and capture the whole thing in one frame.
Photograph in sections
Claude reads shelf titles best from closer shots. Rather than one wide photo where the spines are tiny, break each bookcase into 2–3 sections and photograph each one separately.
The section names map directly to shelf numbers in BookBinder (S1, S2, S3) — so the naming is consistent across your whole library.
Tall stacks
Photograph from top to bottom.
Long shelves
Photograph left to right.
Shelved units
One photo per physical shelf.
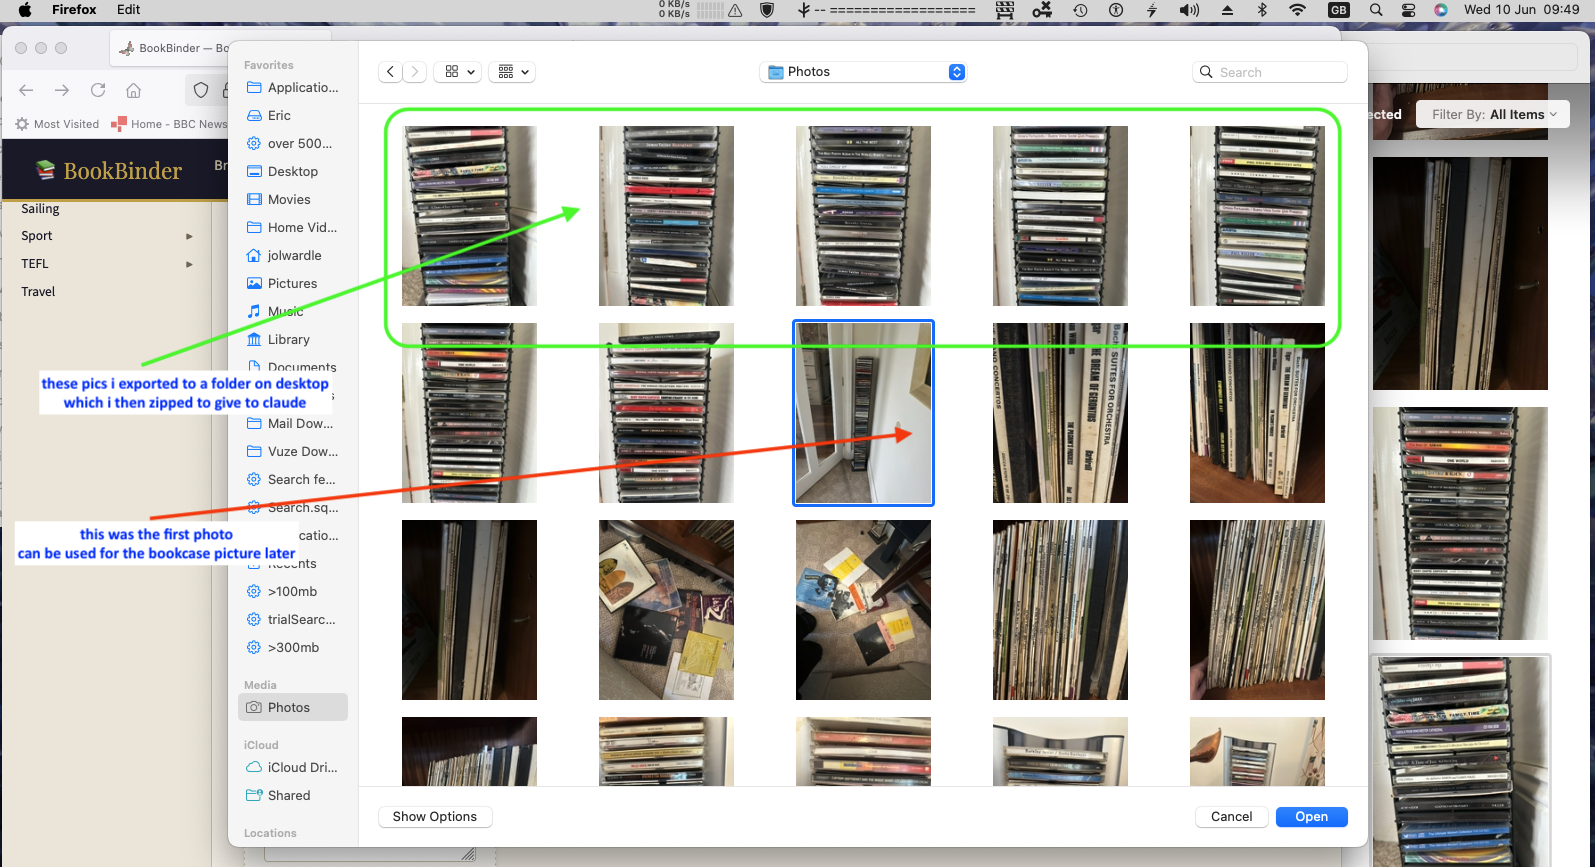
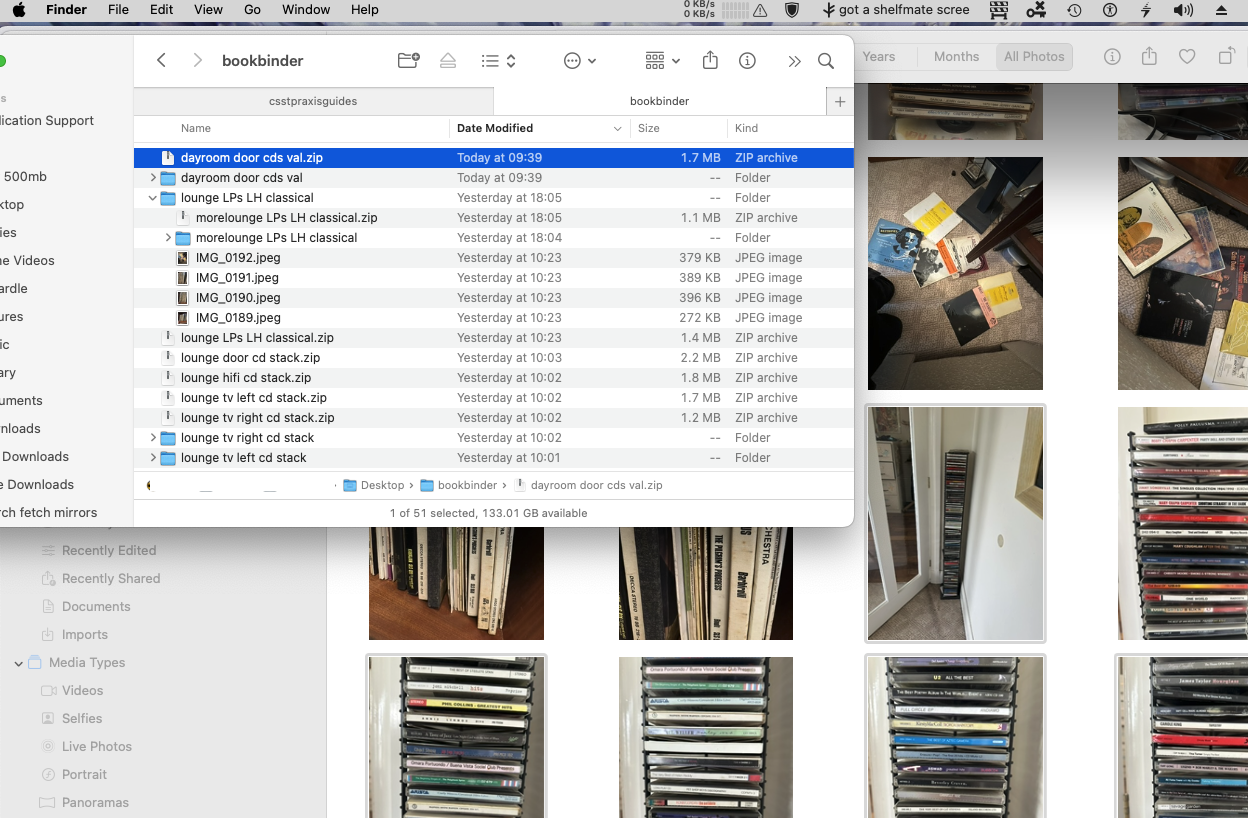
Export and name your files
Export your photos to a folder on your desktop, then name them clearly using this pattern:
- lounge_cds_top.zip
- lounge_cds_middle.zip
- lounge_lps_left.zip
- bedroom_shelf2_left.zip
- dayroom_door_cds_val.zip
The name doesn't need to be rigid — just descriptive enough that you know exactly which bit of which room it refers to, six months from now.
Upload to Claude and get your SQL
Open a new Claude chat and upload your zip file. Claude will read the photos and return an INSERT SQL statement for that bookcase, with titles, artists, categories, and shelf numbers already filled in.
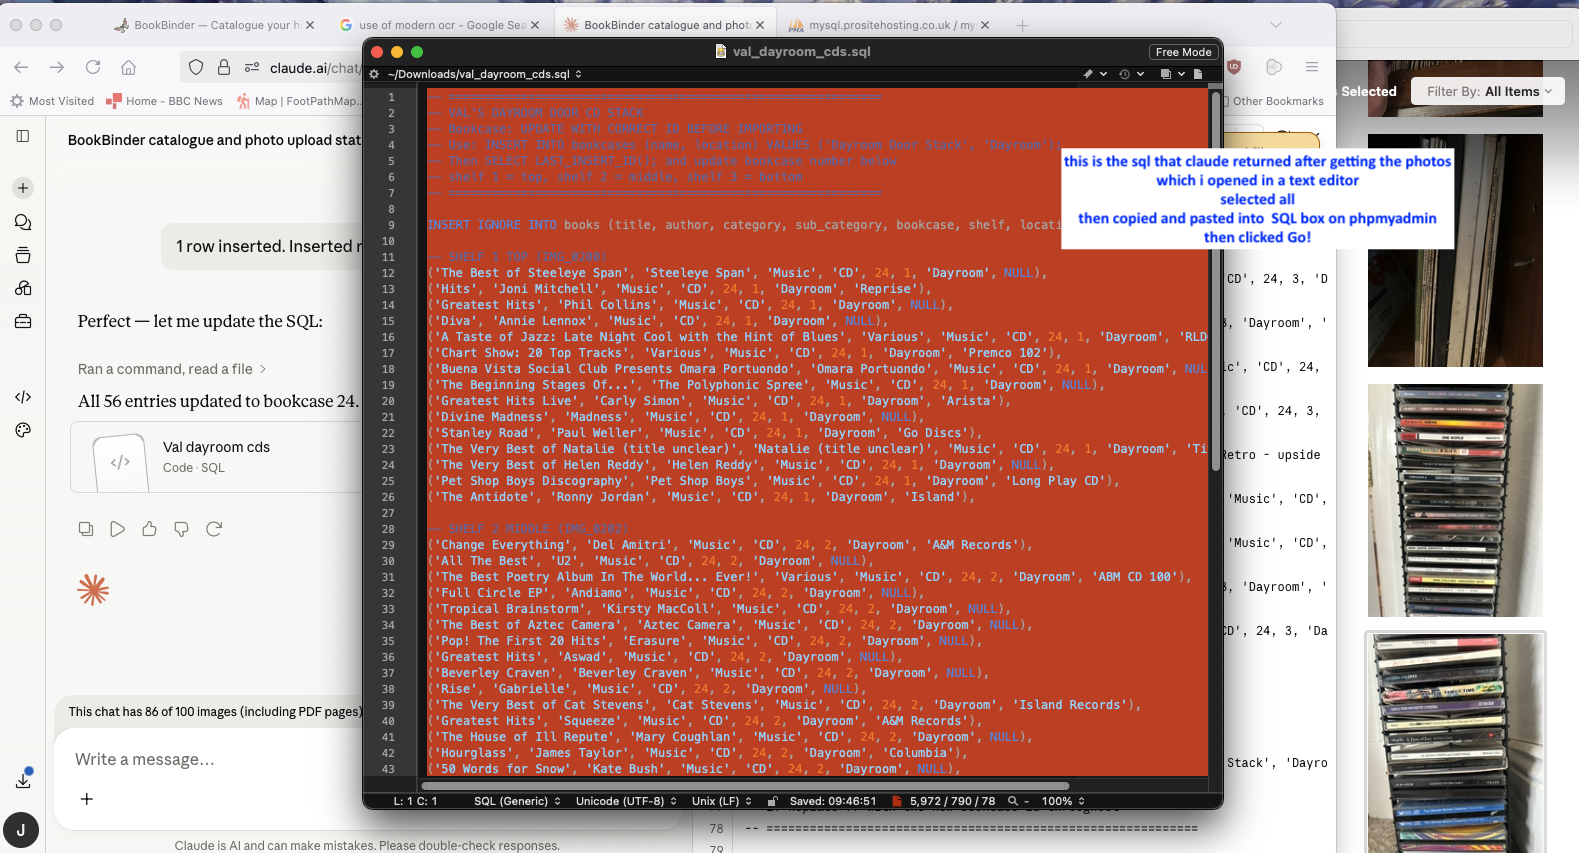
Import the SQL and you're done
Log in as editor, then go to Import SQL in the top menu. Import the SQL Claude gave you — or save it as a .sql file and upload it — then check the preview and confirm. Your new entries appear straight away.
Repeat for each bookcase or section. Once you're done, you'll have a searchable catalogue of your whole library.
INSERT IGNORE and runs as a single transaction — duplicates are skipped automatically, and a mistake can't leave your catalogue half-updated.